

No matter how diverse and unique each guitarist may be, from their tone and touch to their gear preferences, there’s one universal truth: we all eventually need to change our strings. Throughout my career as a guitar maker and repair technician, I’ve witnessed every imaginable approach to stringing, ranging from the ineffective to the downright absurd. I’ve endured enough pricks from razor-sharp, rusty string ends to justify countless tetanus shots, often spending more time removing remnants of old strings than it takes to install a new set.
Surprisingly, many of my clients, even those with decades of playing experience, remain hesitant to change their own strings, fearing they might inadvertently harm their beloved instruments. In an effort to simplify and perhaps even make this process enjoyable, this article aims to provide basic information about restringing, along with a few invaluable tips learned through trial and error.
Determining the Optimal Time to Change Your Guitar Strings
When it comes to the frequency of changing guitar strings, beginning guitarists often seek advice, yet there’s no definitive answer. Several factors influence a string’s lifespan, including the player’s style, how often they play, and even their sweat composition. I’ve encountered guitarists with acidic sweat capable of wearing out a set of strings in as little as 30 minutes, whereas others can go months without needing a change.
In my workshop, I typically recommend changing strings if they show any visible buildup of grime or gunk, particularly noticeable on the underside facing the fretboard, or if the wound strings exhibit any dents or wear spots over the frets. Some players prefer the crisp, lively response of a fresh set, while others favor the mellow, balanced tone of a well-worn set. Discovering the optimal lifespan of a set of strings is essential in selecting the right ones to suit your preferences.
Be Aware of Common Pitfalls to Avoid
One common and easily avoidable mistake during restringing is inadvertently losing parts. Many components on a guitar rely solely on string tension to stay in place—such as bridge pins, the saddle, nut, and tuner bushings (the small metal sleeves around tuner posts)—especially on older guitars. These parts can easily slip off the guitar when the strings are removed, and they can be frustratingly difficult to locate if they fall, which is why I always recommend working on a clean table.
On archtop guitars, the bridge is always secured by tension alone. Thus, when restringing one, it’s crucial to take note of the bridge’s position so it can be correctly replaced. I utilize a small piece of masking tape, de-tacking it first by pressing it against my shirt, before applying it to the guitar top. Placing a small piece on each side of the archtop bridge with a pencil mark aligned to the front edge enables me to reposition the bridge precisely during restringing.
To prevent the loss of bridge pins and for added convenience, I prefer to anchor all the strings in the bridge or tailpiece before winding them onto the posts. It’s essential to ensure that the ball ends are securely anchored—especially in pin-style bridges where ball ends can dangle below the bridge plate, potentially causing mysterious buzzes. I recommend placing the string ball into its designated hole, then inserting the pin loosely. Next, pull up on the string until you feel the ball seat firmly against the bridge plate (underside of the top), and finally press the pin securely into place. For guitars equipped with tailpieces, it’s advisable to double-check each string’s anchor point before tensioning, as ball ends can more easily slip out during installation.
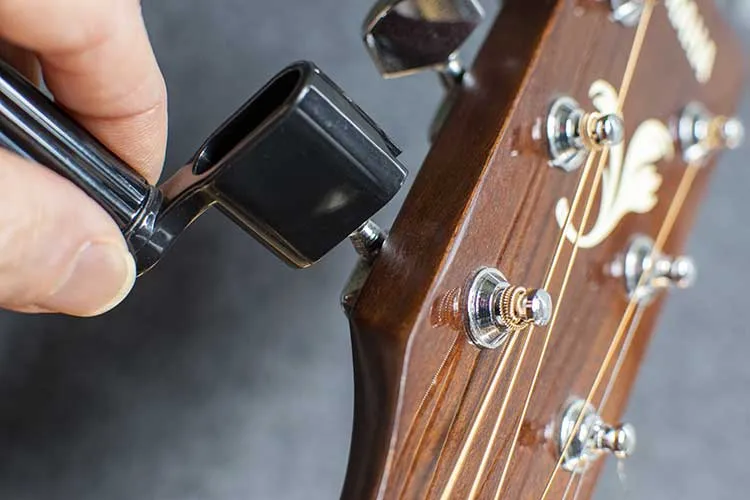
Master a Foolproof Method
When I first learned to change strings, I was introduced to a somewhat intricate technique involving tucking the loose end of the string beneath the initial coil on the tuner post to prevent slippage. It took me years to master this method without leaving excess slack in the loops. Removing old strings was also a hassle, often resulting in broken strings stuck in the tuner holes, necessitating careful extraction with pliers—a less than enjoyable task, to say the least.
The fundamental concept of this method is to create opposing kinks in the string on either side of the tuner post. Here’s how it works: insert the string through the post, leaving a small amount of slack between the nut and bridge (approximately enough to fit four fingers between the stretched string and fretboard). Then, simultaneously bend the string on both sides of the post, forming a Z shape through the hole. (For bass-side strings, bend both sides clockwise). Trim off the excess string and wind up the slack onto the tuning post, ensuring that each wrap goes below the previous ones to bring the string closer to the headpiece with each turn.
If the correct amount of slack is left, you should have two to three wraps on heavier strings and three to five on thinner ones. Excessive wraps can lead to tuning issues, as they may pile up unevenly and not wind evenly around the post. Conversely, too few wraps may cause the string to slip, regardless of how it’s wound.
This simple Z bend method is quicker than any other technique I’ve encountered and has consistently proven reliable over countless string changes. Strings are effortlessly removed from the posts, and even if they break, the remaining ends simply fall out without the need for tools. Over the years, I’ve encountered strings that were double-threaded through the post, knotted, twisted, or even dabbed with superglue to secure them—a testament to the frustration such methods can cause. Whether you change your strings yourself or entrust it to a technician, this straightforward and foolproof approach ensures a more dependable and enjoyable experience.
As for a classic mistake when restringing a 12-string guitar, it’s crucial to wind the octave G string from the top downward, below the string hole in the tuner. Failing to do so may lead to difficulty tuning it to pitch, as the sharp edge of the hole can gradually cut the string. Tuning it open to the same pitch as the high E at the 3rd fret is advisable, following advice from a trusted friend—a reminder of the invaluable support friends provide throughout life’s endeavors.