This comprehensive guide provides step-by-step instructions on how to clean a guitar, covering everything from the fretboard to the hardware. Learn essential techniques and materials needed to maintain your guitar’s appearance, playability, and longevity, ensuring optimal performance for years to come.
Step-by-Step Guide to Cleaning Your Guitar
Here are the concise steps to make your guitar shine like it’s new!
- Wash Your Hands: It’s obvious, but it’s also the most important step!
- Remove the Strings: This will make cleaning the body and fretboard a lot easier.
- Clean the Fretboard:
- For Rosewood, Ebony, or Pau Ferro fretboards: Use fine steel wool to remove stubborn gunk and apply lemon oil to rehydrate.
- For Maple fretboards: Use a damp cloth to clean.
- Polish the Guitar’s Body:
- For poly-finished (gloss) guitars: Spray guitar polish onto a soft cloth and wipe down. Use a dry part to buff out the polish.
- For matte/satin/nitro-finished guitars: Use only a dry cloth.
- Refresh the Hardware:
- Use a soft cloth and a tiny amount of guitar polish to remove dirt or dried sweat.
- For thicker grime or rust, WD-40 can be used.
What Causes a Guitar to Accumulate Dirt?
The extent of dirt accumulation on your guitar largely depends on the environment where you frequently play and the duration of your sessions. For instance, if you regularly perform gigs, enduring hot stages and bright lights can lead to profuse sweating, which is detrimental to your guitar.

Sweating excessively during performances poses a significant risk to your guitar’s condition. The sweat and grease on its surface not only mar its appearance but also corrode the lacquer, potentially causing irreversible damage to the fretboard. Moreover, sweat can seep into your guitar’s electronic components and hardware, promoting rust and other issues.
Conversely, if you practice for 1-2 hours daily in a cool, well-ventilated room at home, your guitar may require less frequent cleaning. Ultimately, the necessity for cleaning hinges on the context and prevailing conditions of use.
How to Maintain a Clean Guitar?
Before delving into the detailed cleaning process for specific parts of your guitar, it’s beneficial to highlight preventive methods to mitigate grime accumulation. Implementing these measures can save you time and effort down the line. Trust me!
Always Wash Your Hands Before Playing Guitar

Here’s a life hack: Wash your hands before picking up your guitar. It’s a simple yet effective practice that many musicians already follow. You’d be surprised how many players neglect this step and wonder why their guitar ends up covered in smudges and their strings sound like rubber bands after eating greasy food.
By washing your hands before playing, you not only keep your guitar clean but also extend the life of your strings. This small habit saves you time and money, reducing the frequency of string replacements and the time spent changing them. Just give your hands 5-10 minutes to fully dry, then you’re ready to play.
Keep Your Guitar’s Strings Clean
After each playing session, simply apply these cleaning lubricants to the strings to remove any grime. Not only will you restore sparkly-sounding freshness to your guitar, but you’ll also enjoy a faster playing feel, preparing your instrument for the next time you pick it up.
Store Your Guitar in Its Case
While displaying your guitars on the wall may be aesthetically pleasing, it comes with a downside: dust accumulation. Dust, although not as problematic as sweat, can still gather in the nooks and crannies of your guitar, potentially affecting its electronics and functionality over time.
Ever experienced crackling noises when adjusting your guitar’s pickup selector or volume pot? More often than not, dust is the culprit. Fortunately, this issue can usually be resolved by removing the cavity plate on the back of your guitar and blowing the dust out.
Therefore, storing your guitar in its case (whether a hard case or gig bag) is advisable. This practice helps keep your guitar mostly dust-free and ensures its reliability and crackle-free performance.
At some point, your guitar will inevitably require cleaning, even if you diligently follow the recommendations provided above. While it’s possible to clean your guitar without removing the strings, a more thorough cleaning may necessitate their removal – and it can make the process much easier! As a general rule, I typically align my guitar cleaning schedule with the need for a string change.
Electric Guitar Strings
Begin by washing your hands and establishing a dedicated workspace for cleaning your guitar. Opt for a well-lit area to ensure easy detection of any imperfections needing attention. You can set up your guitar on a workbench, table, desk, or simply rest it on your lap, depending on your preference.
How To Clean A Guitar Fretboard
Cleaning a guitar fretboard is an essential part of guitar maintenance, ensuring optimal playability and prolonging the life of your instrument. Here’s how to clean a guitar fretboard effectively:
Materials Needed:
- Soft, lint-free cloth
- Guitar fretboard cleaner or lemon oil
- Small brush or toothbrush
- Steel wool (optional, for stubborn grime on unfinished fretboards)
Step-by-Step Guide:
1. Prepare Your Workspace:
- Find a well-lit and comfortable workspace where you can lay your guitar flat or prop it up securely.
2. Remove the Strings (Optional):
- While not necessary, removing the strings can provide better access to the fretboard for thorough cleaning.
3. Dust Removal:
- Use a soft cloth or a small brush to gently remove any dust and debris from the fretboard surface and around the frets.
4. Apply Fretboard Cleaner or Lemon Oil:
- Apply a small amount of guitar fretboard cleaner or lemon oil onto a clean cloth.
- Gently rub the cleaner or oil onto the fretboard, covering the entire surface evenly.
- Allow the cleaner or oil to penetrate the wood for a few minutes to loosen dirt and grime.
5. Scrub Stubborn Grime (Optional):
- For stubborn grime or buildup, you can lightly scrub the fretboard with a soft brush or toothbrush.
- If you have an unfinished fretboard (e.g., rosewood or ebony), you can use fine steel wool to gently scrub away tough grime. Be careful not to scratch the wood.
6. Wipe Clean:
- Using a clean cloth, gently wipe away the cleaner or oil along with any loosened dirt and grime.
- Ensure that no excess cleaner or oil remains on the fretboard surface.
7. Condition the Fretboard (Optional):
- If your fretboard is particularly dry or in need of conditioning, you can apply a small amount of lemon oil to nourish and protect the wood.
- Apply the oil sparingly and evenly across the fretboard surface, then wipe away any excess with a clean cloth.
8. Reassemble (If Strings Were Removed):
- If you removed the strings, restring your guitar following the manufacturer’s instructions or your preferred method.
9. Final Inspection:
- Take a moment to inspect the fretboard for any remaining dirt or residue. Repeat the cleaning process if necessary.
By following these steps, you can effectively clean your guitar fretboard, keeping it in excellent condition for years to come. Remember to perform regular maintenance to ensure optimal playability and sound quality.
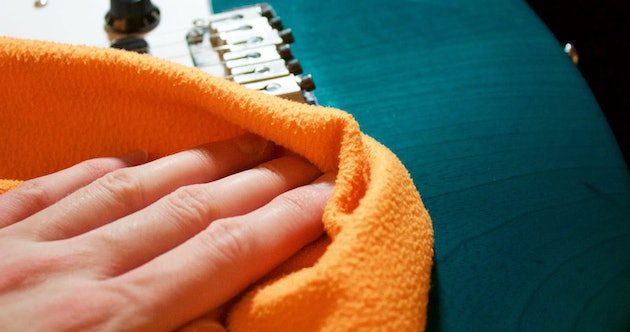
How To Clean A Guitar Body
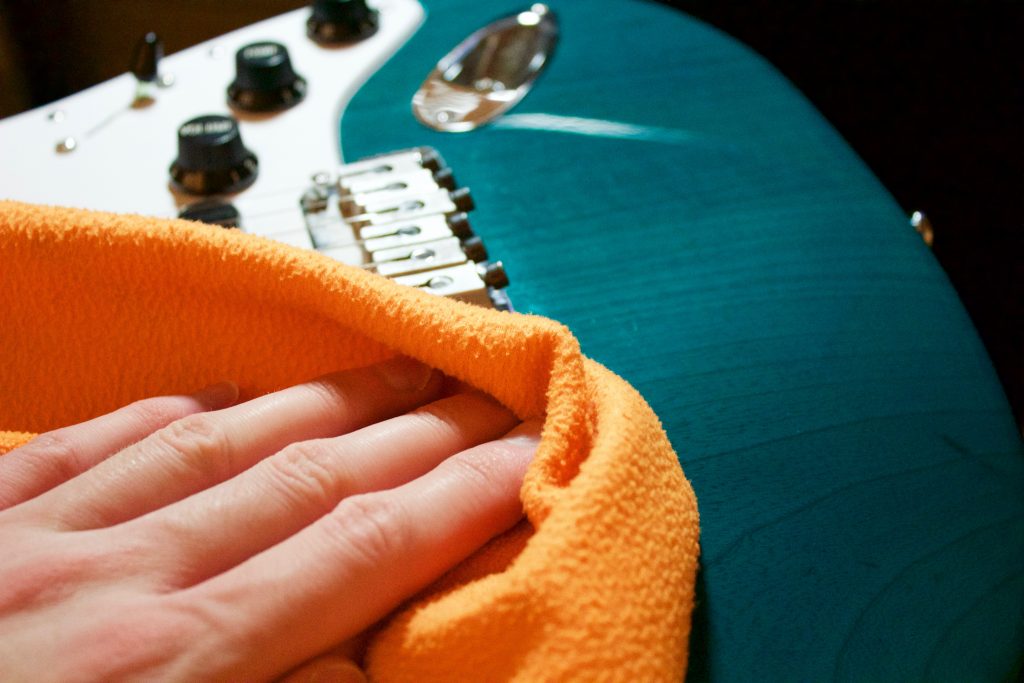
Cleaning the body of your guitar is essential for maintaining its appearance and longevity. Here’s a step-by-step guide on how to clean a guitar body effectively:
1. Prepare Your Workspace:
- Find a well-lit and comfortable area where you can safely place your guitar.
2. Remove the Strings (Optional):
- While not necessary, removing the strings can provide better access for thorough cleaning.
3. Dust Removal:
- Use a soft cloth to gently wipe away any dust and debris from the guitar body, paying attention to hard-to-reach areas such as around the pickups and bridge.
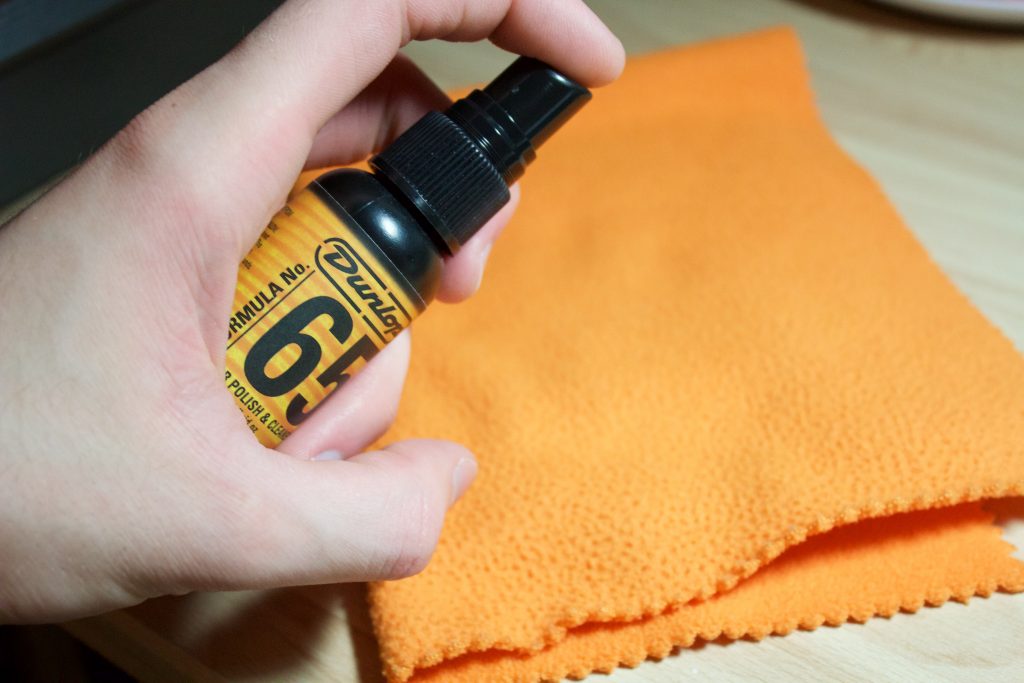
4. Apply Guitar Polish or Cleaner:
- Apply a small amount of guitar polish or cleaner onto a clean cloth.
- Gently rub the polish or cleaner onto the guitar body in circular motions, covering the entire surface evenly.
- If your guitar has stubborn grime or fingerprints, dampen the cloth slightly with water before applying the polish or cleaner.
5. Buff the Surface:
- Using a separate clean cloth, buff the guitar body in circular motions to remove any excess polish or cleaner and achieve a shiny finish.
6. Inspect and Touch Up (Optional):
- Take a moment to inspect the guitar body for any remaining dirt or imperfections.
- If necessary, repeat the cleaning process or spot-clean specific areas using a damp cloth.
7. Reassemble (If Strings Were Removed):
- If you removed the strings, restring your guitar following the manufacturer’s instructions or your preferred method.
8. Final Inspection:
- Once the guitar body is clean and dry, give it a final inspection to ensure it looks and feels great.
By following these steps, you can effectively clean the body of your guitar, keeping it looking and sounding its best for years to come.
How To Clean A Guitar Hardware
Cleaning guitar hardware is crucial for maintaining its appearance and functionality. Here’s a step-by-step guide on how to clean a guitar hardware effectively:
Materials Needed:
- Soft cloth
- Guitar polish (optional)
- WD-40 (optional)
- Toothbrush (optional)
- Cotton buds (optional)
Step-by-Step Guide:
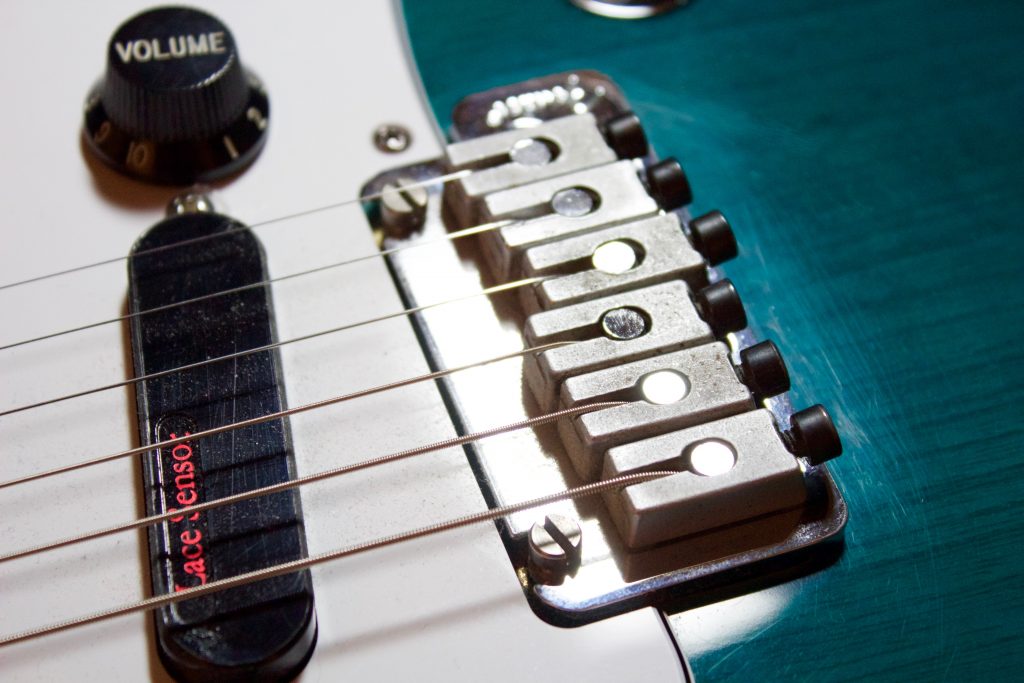
1. Assess the Hardware:
- Inspect the hardware (e.g., bridge, pickups, frets) for dirt, grime, or corrosion.
2. Dust Removal:
- Use a soft cloth to gently wipe away any dust or debris from the hardware.
3. Polish (Optional):
- Apply a small amount of guitar polish to a soft cloth.
- Gently rub the polish onto the hardware in circular motions to remove dirt and restore shine. Ensure no polish residue remains.
4. Cleaning Tight Spaces:
- Use cotton buds to clean hard-to-reach areas, such as between string saddles on a bridge, to remove dust and grime.
5. Tackling Corrosion or Rust:
- If hardware is affected by corrosion or rust, consider using WD-40.
- Apply WD-40 to a toothbrush and gently scrub the affected areas to remove thick grime and rust. Ensure the hardware is removed from the guitar to prevent damage to the finish.
6. Final Inspection:
- Once cleaned, inspect the hardware to ensure it is free of dirt, grime, and corrosion.
7. Reassembly (If Necessary):
- If hardware components were removed for cleaning, reassemble them onto the guitar following the manufacturer’s instructions.
By following these steps, you can effectively clean the hardware on your guitar, ensuring it remains in top condition for optimal performance and longevity.
Conclusion
Keeping your guitar clean is essential for maintaining its appearance, playability, and longevity. By following the steps outlined in this guide, you can ensure that every part of your guitar, from the fretboard to the hardware, remains in excellent condition. Regular cleaning and maintenance will not only keep your guitar looking and sounding great but also help prevent issues like corrosion and rust. So take the time to clean your guitar properly, and you’ll be rewarded with many more years of enjoyable playing.
Read more: Easy Guitar Riffs for Novice Players
Your words feel like they’ve been chosen with the utmost care — each one placed to guide us towards greater understanding.